Do you feel like internet advertisements are violating your privacy? Setting up Pi-hole on a Raspberry Pi Zero W might be the solution you need! By installing Pi-hole as an ad blocker, you will be able to block ads from appearing on websites, apps, or even in social media feeds!
The benefits of blocking ads on the internet are plentiful. Blocking ads will help you protect your privacy, avoid malicious software that is often injected into webpages via advertisements, and decrease bandwidth usage by preventing websites from loading unnecessary content to display their ads. If this sounds like something you want to do, read on for more information about how to set up Pi-hole on a Raspberry Pi Zero W!
What Is Pi-hole, and What Function Does It Serve?
Pi-hole is a Linux program that operates over a network, receiving DNS queries from other deceives in the same network. Pi-hole can do two things with the requests it receives:
- forward requests to an upstream DNS recursive resolver, ensuring they are completed as normal.
- sinkhole requests so they never complete, effectively blocking them.
After Pi-hole has been installed and is running, you will be able to instruct your devices to use its IP address to route all DNS requests through it.
How Does the Ad-blocking on Pi-hole Work?
Typically, when a website wants to load ads, it will do so from an external domain that belongs to an ad network. Pi-hole monitors all requests, and any requests for ads (or anything on the “blocklist”) are routed to the sinkhole.
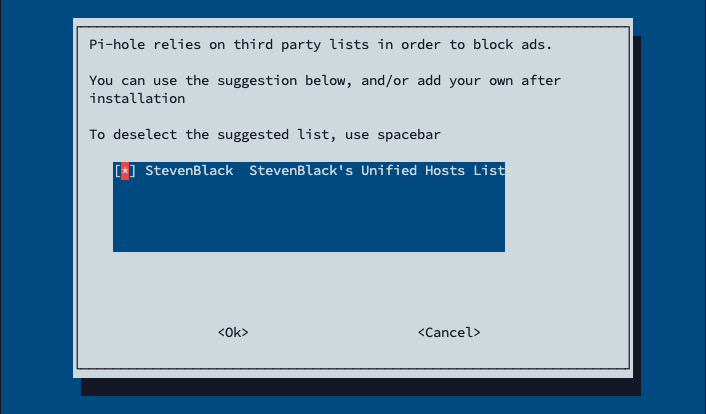
The default list that comes with Pi-hole is good enough to get you started. However, if you wanted to extend the blocking capabilities of Pi-hole, precompiled lists can be found online. These can be loaded into Pi-hole, allowing you to block large swaths of domains quickly and easily. Some of the ones we recommend are:
What is needed to set up Pi-hole?
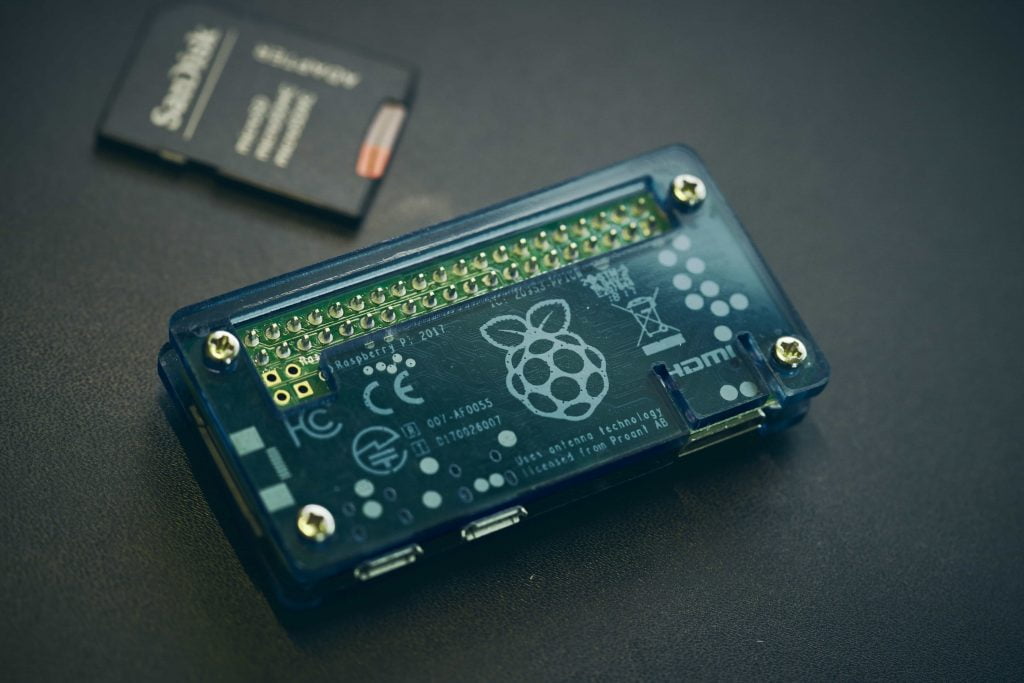
- Raspberry Pi Zero W
- Raspberry Pi Zero case
- Official Power Supply
- Mini-HDMI to HDMI adapter
- MicroSD card (ideally 8GB or higher) and some form of MicroSD Card Reader
How to install Pi-hole on a Raspberry Pi Zero W
There are many different ways you could go about installing Pi-hole, there is support for those who wish to use Docker, or even install using Snap. But in this guide we will be following the One-Step Automated Install from Pi-hole.
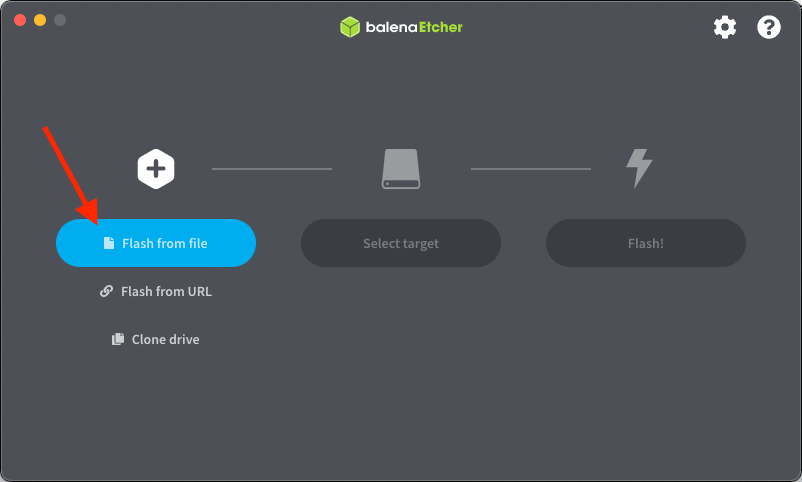
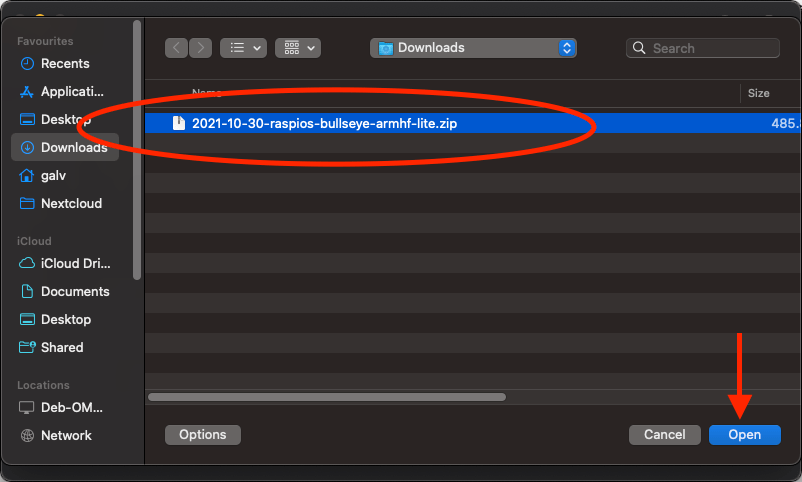
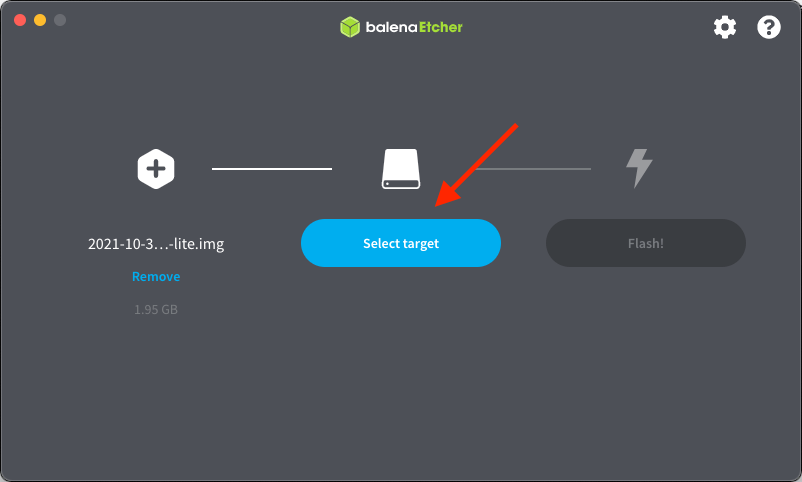
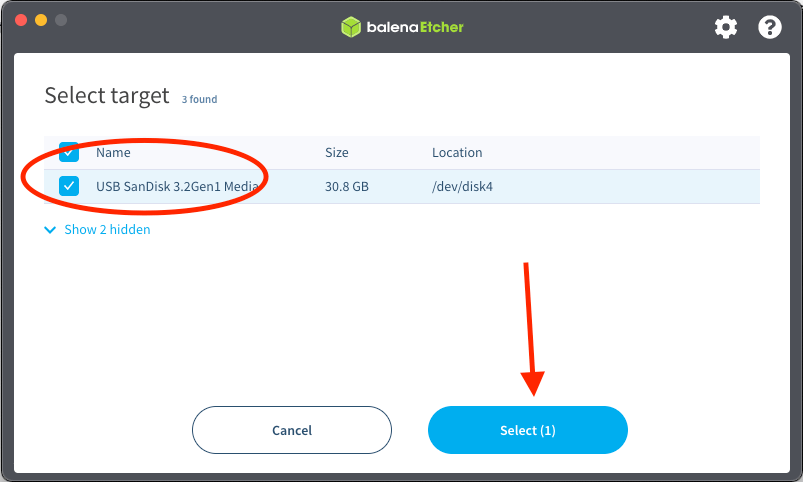
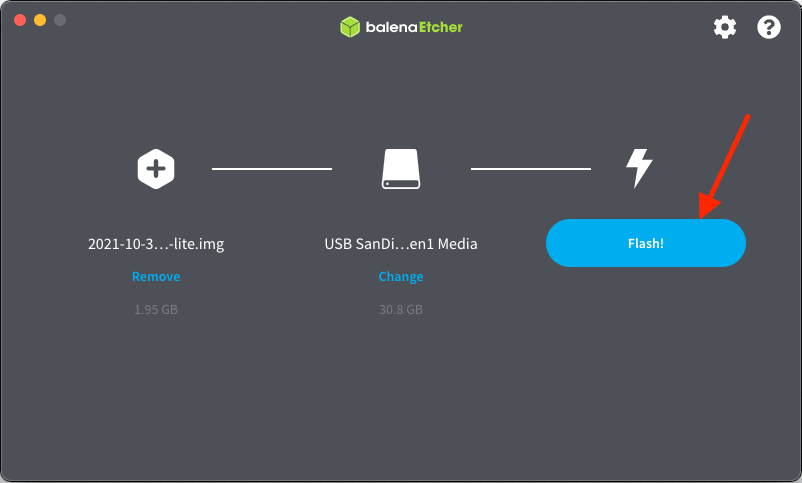
First, we need to download the operating system we are planning to use, and get it onto the Raspberry Pi Zero W. To do this, head to the Raspberry Pi Download page and grab a copy of the Raspberry Pi OS Lite. Using Etcher, we will flash this to the microSD card once the file has been downloaded.
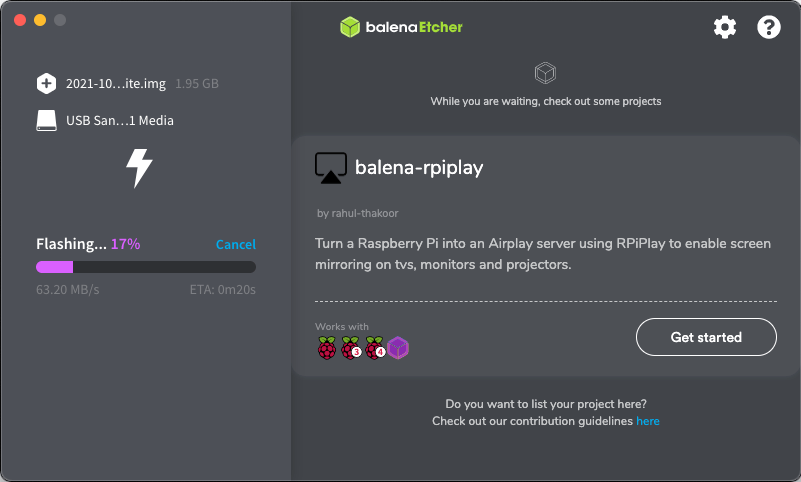
Remove the microSD card from your Raspberry Pi Zero when the flashing process completes. Next, connect the device’s power supply, monitor, keyboard, and Ethernet (if so desired).
You should now be able to boot up your Raspberry Pi Zero. Your monitor will show some status codes during this process – this is normal. Once the initial boot sequence is complete, you’ll be prompted to log in.
The default login credentials are:
- User: pi
- Password: raspberry
Changing the password is strongly recommended. To change the password, issue the following command into the terminal:
passwdEnter the current password of ‘raspberry’ and select a new password.
Next, we will need to enter the credential to join the WiFi network (if you don’t want to use ethernet).
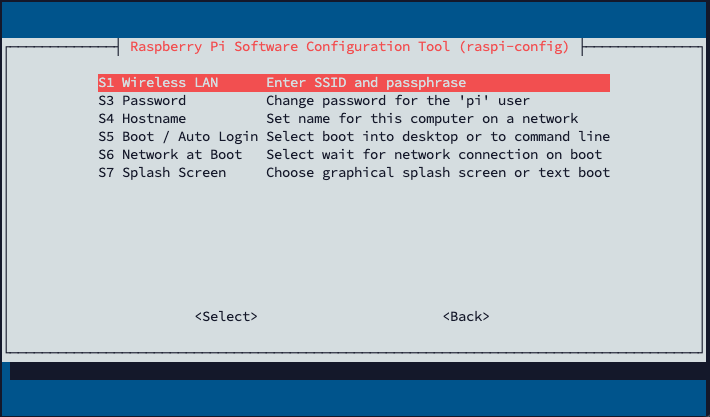
Use the following command to enter the config menu for Raspberry Pi OS:
sudo raspi-configNavigate to System Options > Wireless LAN and enter your WiFi credentials so the pi can join the network.
Next, we would want to ensure our Pi has all the latest updates – issue the following command to pull the updates from the repositories:
if prompted, type ‘y’ to approve the updates
sudo apt update && sudo apt upgrade -yOnce the updates are complete – it would be wise to reboot the pi, do this with the following command:
sudo reboot nowNow the pi is connected to the internet and has the latest updates, we can begin the process of installing Pi-hole. Pi-hole can be installed in a few different ways, but for simplicity, we’re going to follow the One-Step Automated Install.
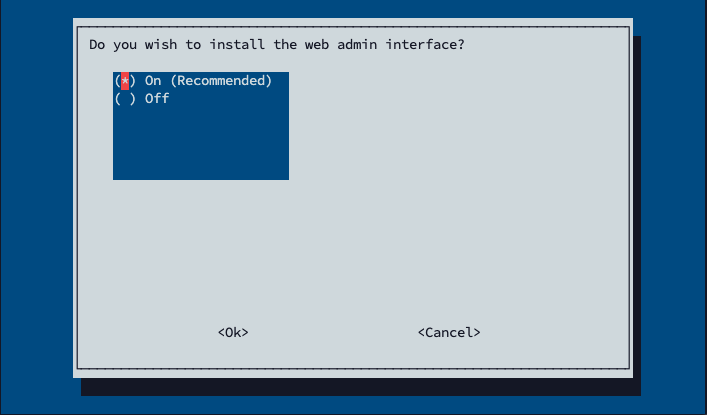
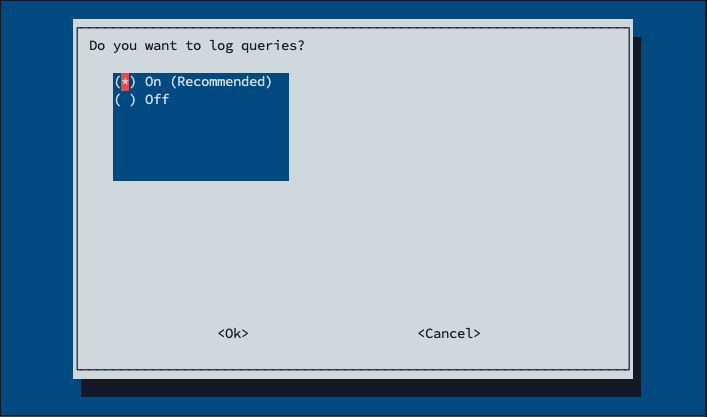
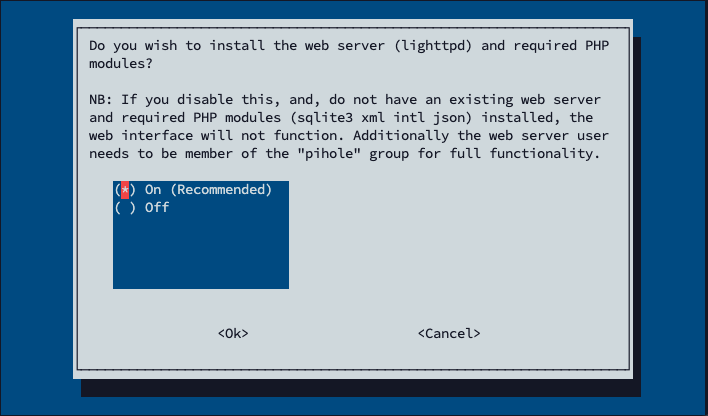
curl -sSL https://install.pi-hole.net | bashMost of the install process is relativity straightforward, but there are a few key points you will see listed below:
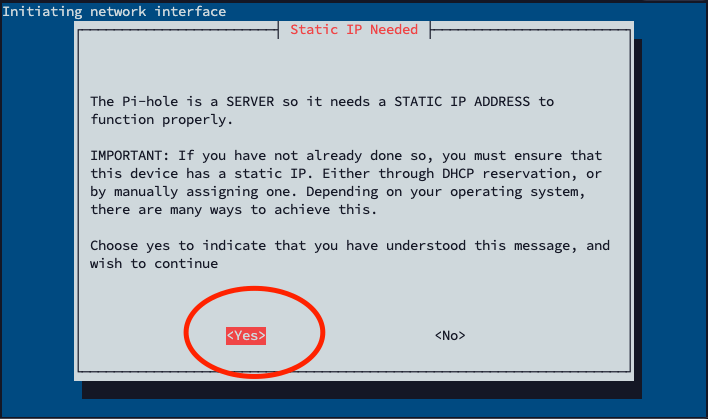
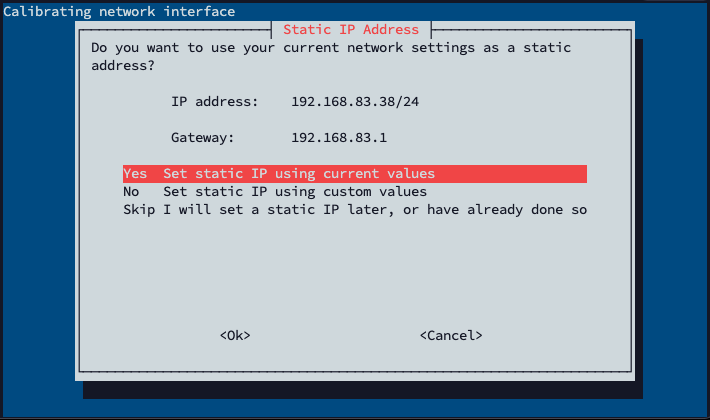
Set a static IP address for the Pi – as this will be used by other clients in the network, it’s important this doesn’t change.
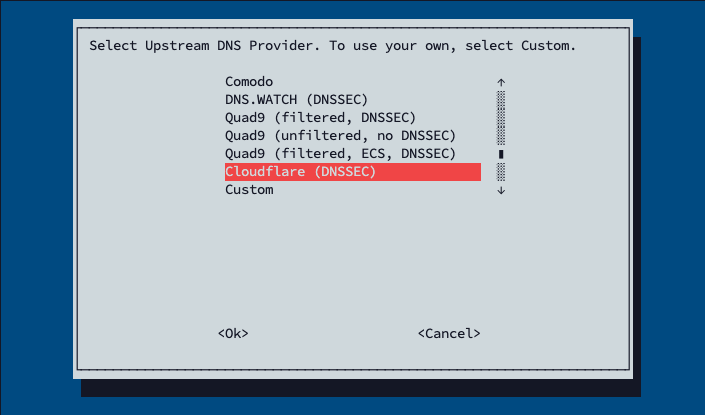
You are free to choose an upstream DNS provider of your choice, personally, I use Cloudflare but the choice is yours on what you prefer.

This is the last part of the install process, be sure to make a note of the password that has been generated by Pi-Hole as you will need this to log into the admin panel for Pi-hole.
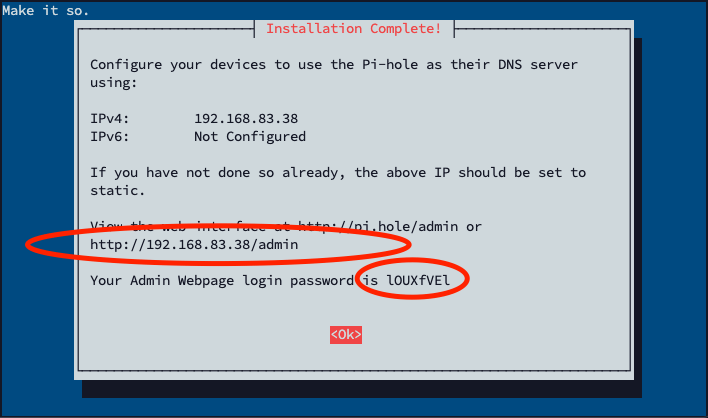
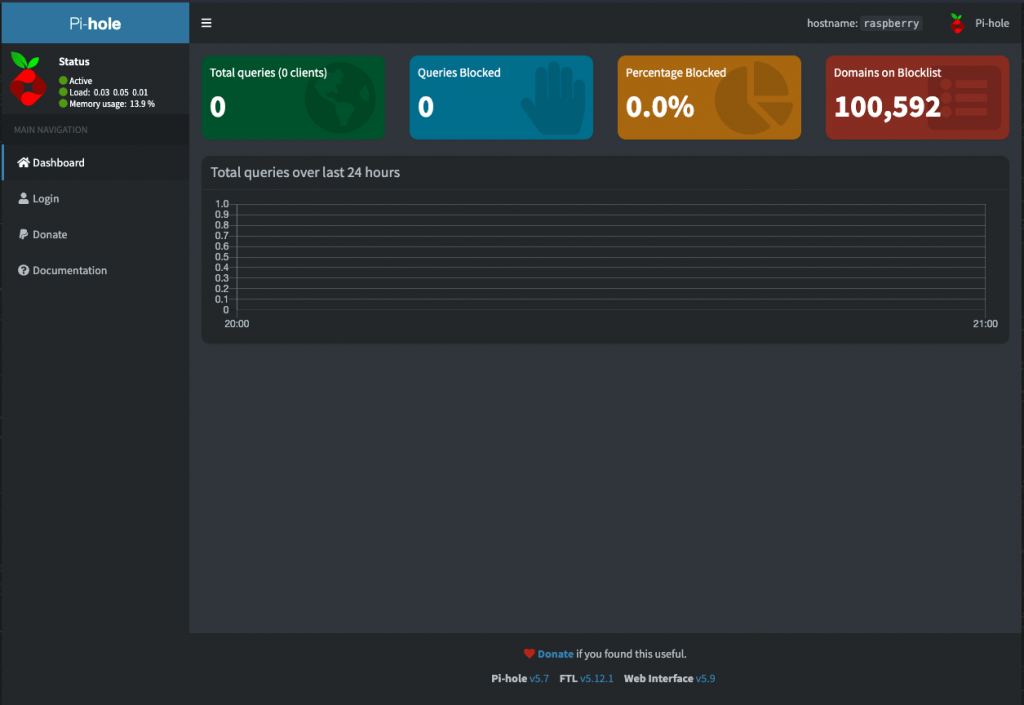
To login to the admin panel for Pi-hole, simply visit the IP address given to you at the last stage of the install process.
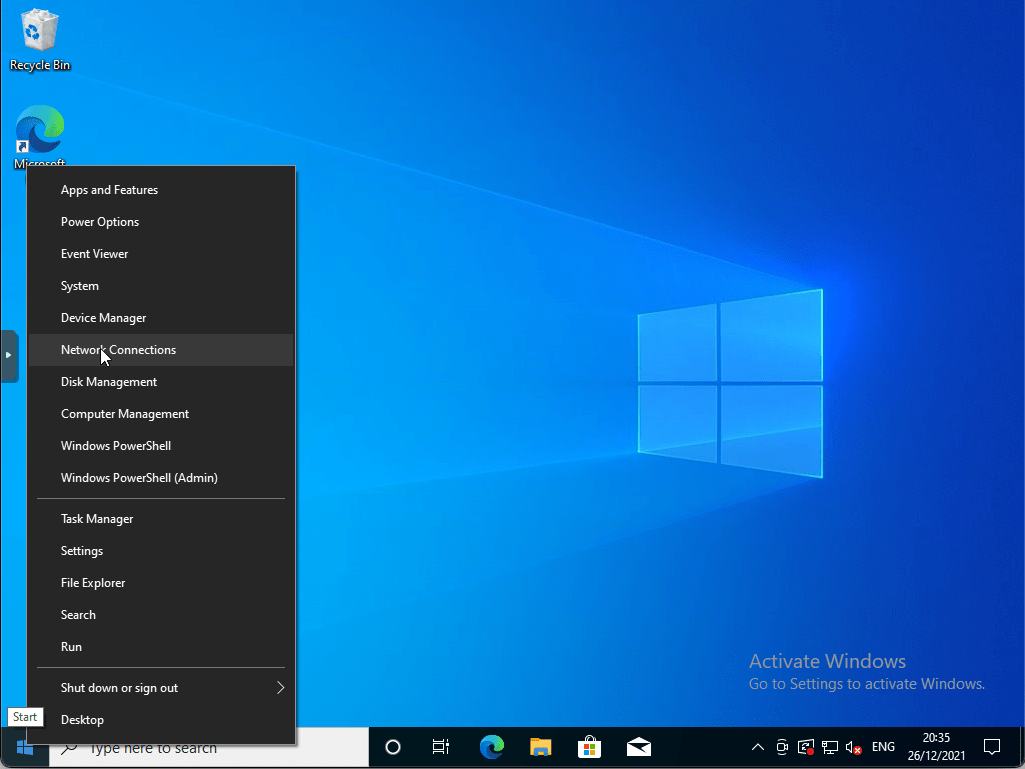
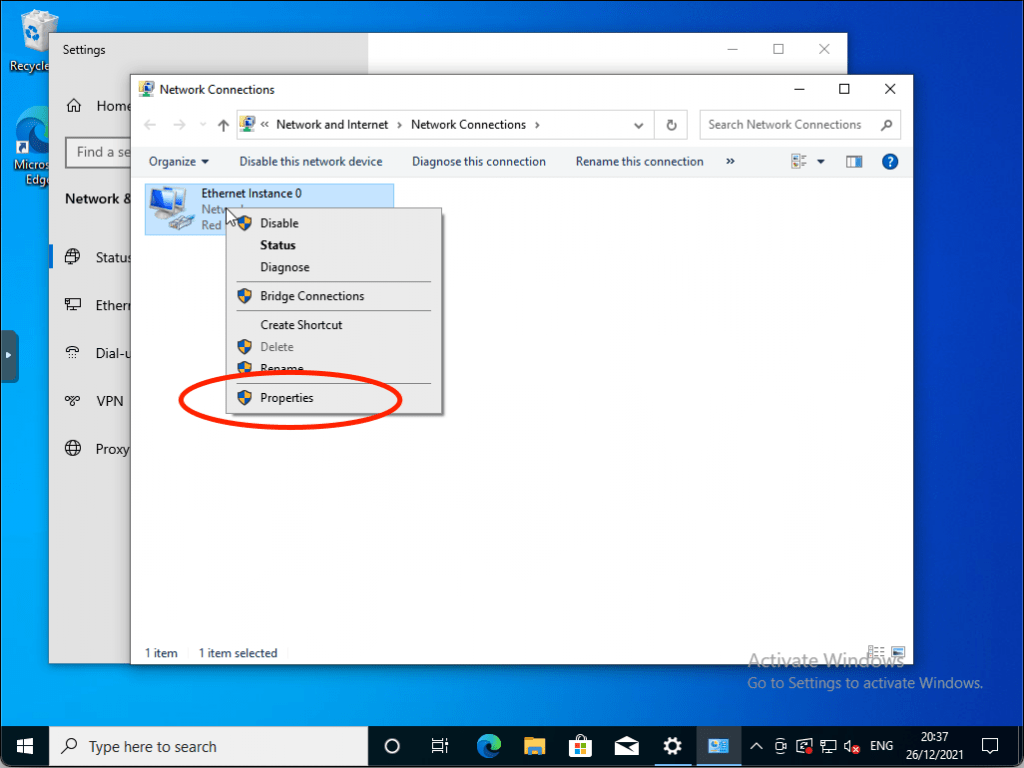
How to point Your Devices to Pi-Hole
Now that Pi-hole is running on the network, we simply need to point our devices to it, so they route their DNS queries through Pi-hole. This is quite a simple process but varies from platform to platform.
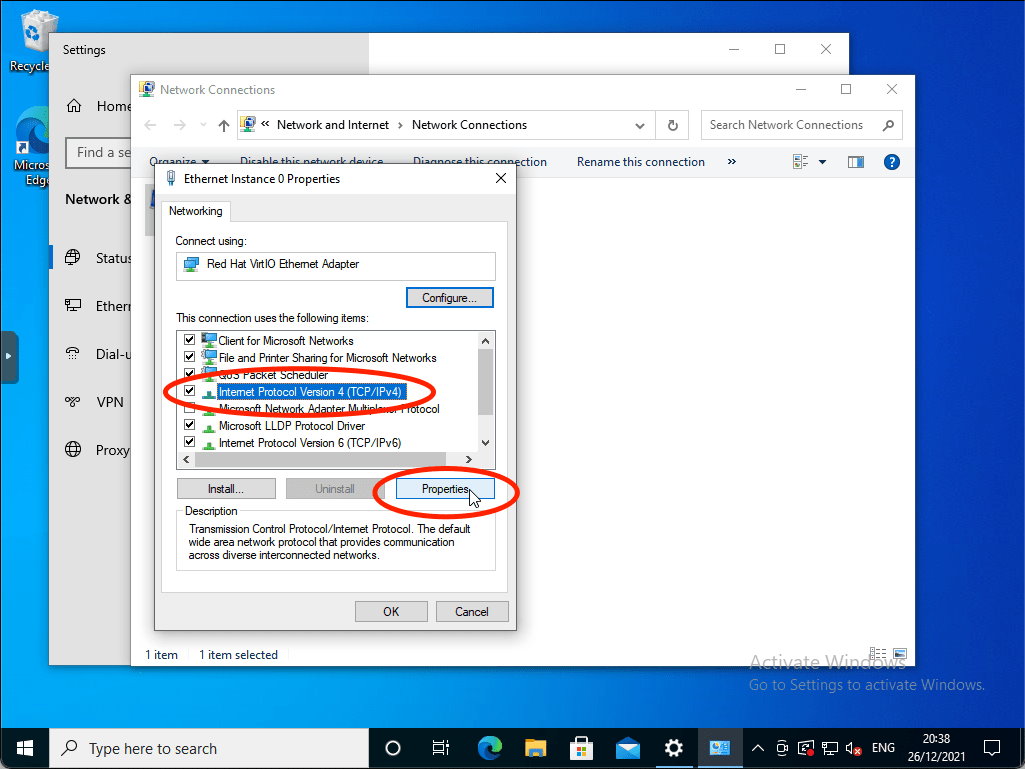
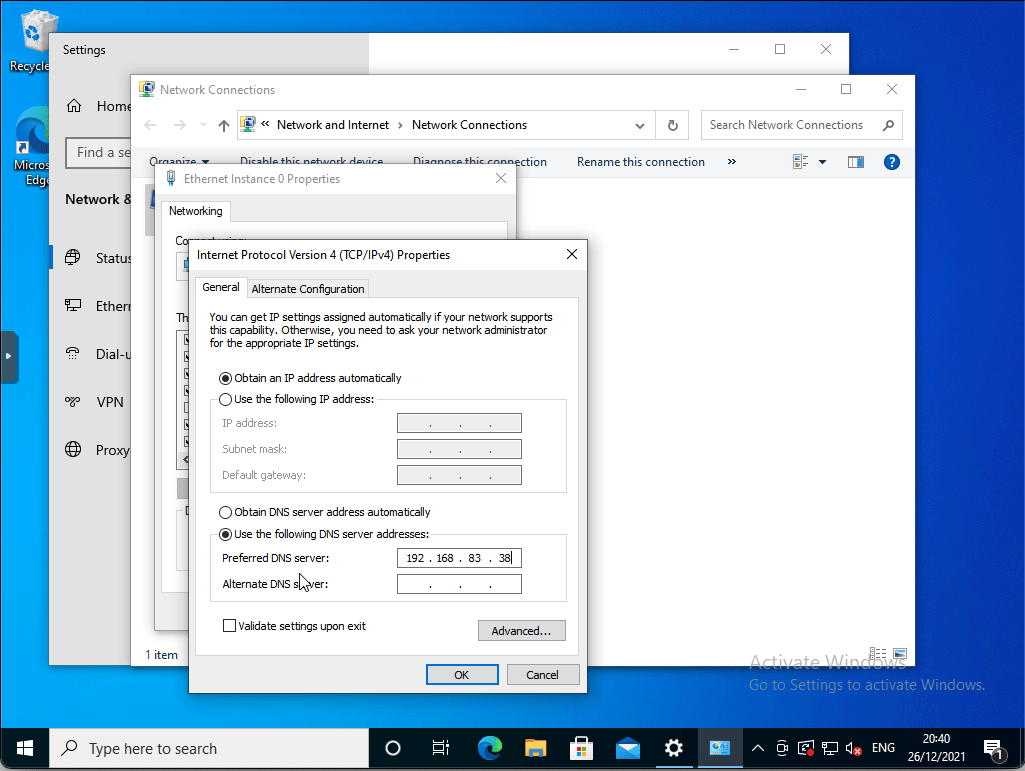
Windows

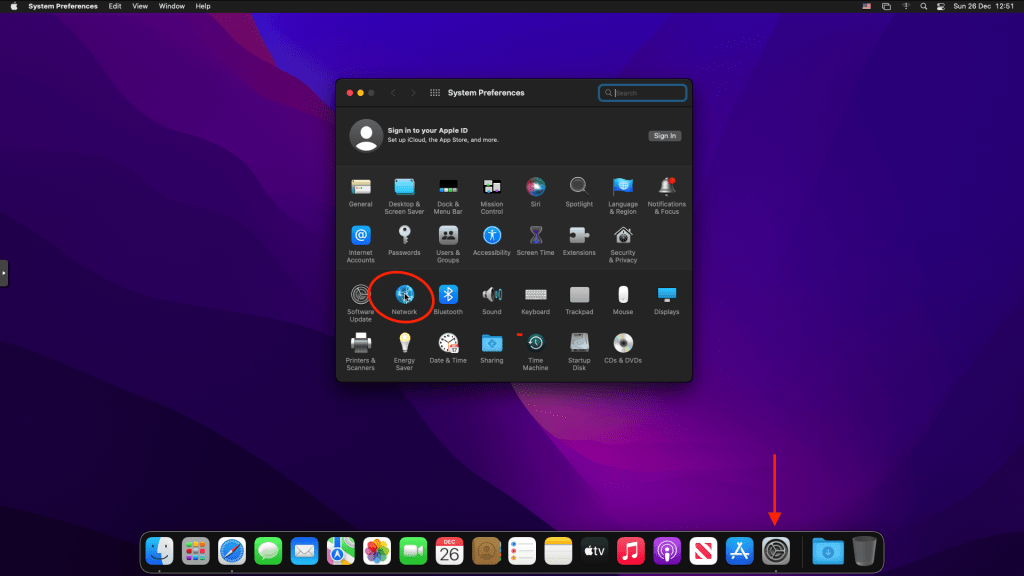
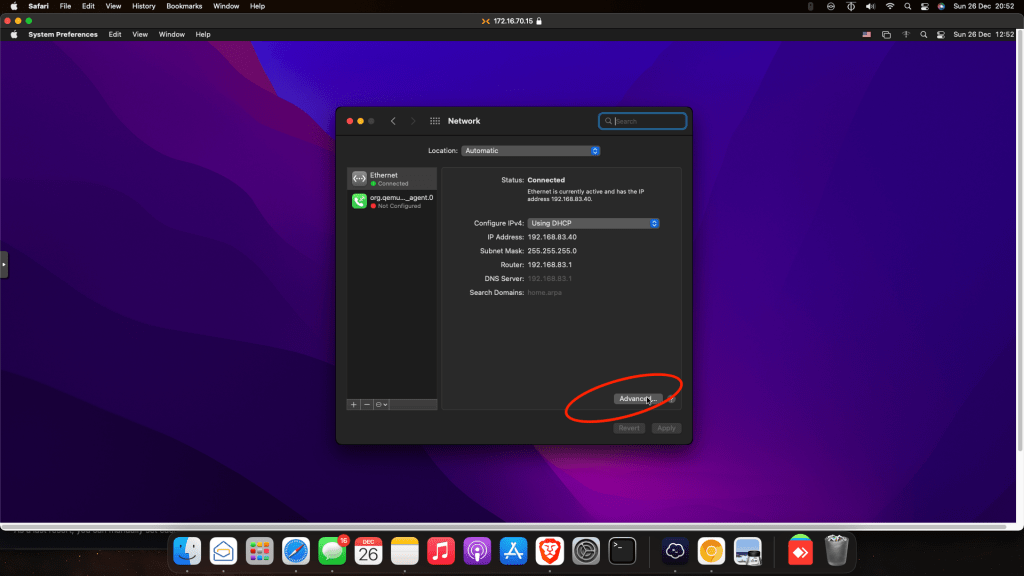
Mac OS
Conclusion:
We hope you enjoyed learning about Pi-hole and how to block ads. There are many benefits of installing Pi-Hole on your raspberry pi, including blocking unwanted content from appearing in your browser or using up bandwidth when streaming videos online. Now go ahead and enjoy faster loading times for webpages without any pesky ads!