Nextcloud is an open-source, self-hosted file sync and sharing solution for everyone. If you want to host your own files with Nextcloud, this guide will show you how to install the official Nextcloud image on Docker with Redis caching enabled! Thanks to Docker, getting Nextcloud with Redis caching up and running is quite simple when you know the steps needed.
What is Nextcloud and why should I use it
Nextcloud is a cloud-based storage platform that works with any device and enables you to securely store, access, and share your files. It’s is a great solution for anyone who wants to host their own files, as it provides a lot of features and flexibility. Some of the reasons why you should be using Nextcloud are:
1. It’s open-source and free to use.
2. It provides a lot of features and flexibility.
3. It’s easy to set up and can be run on a variety of platforms.
Prerequisites:
In this article, we are going to assume you have a server with docker, docker-compose, and Portainer running. You should also have a suitable location for persistent data to be stored. In this example, we are using a Debian-based Linux distribution. For Ubuntu or other Debian-based distros, you can use the same commands.
Docker-Compose File:
version: '2'

volumes:
  nextcloud:
  db:

networks:
  nextcloud_network:
    external: false

services:
  db:
    image: mariadb
    restart: unless-stopped
    command: --transaction-isolation=READ-COMMITTED --binlog-format=ROW --innodb-file-per-table=1 --skip-innodb-read-only-compressed
    volumes:
      - db:/var/lib/mysql
    environment:
      - MYSQL_ROOT_PASSWORD=random_msql_root_password
      - MYSQL_PASSWORD=must_match_1
      - MYSQL_DATABASE=must_match_2
      - MYSQL_USER=must_match_3
    networks:
      - nextcloud_network

  app:
    image: nextcloud
    restart: unless-stopped
    ports:
      - 8080:80
    links:
      - db
    volumes:
      - /path/to/your/config/folder:/var/www/html
      - /path/to/your/storage/data/folder:/var/www/html/data
    environment:
      - MYSQL_PASSWORD=must_match_1
      - MYSQL_DATABASE=must_match_2
      - MYSQL_USER=must_match_3
      - MYSQL_HOST=db
      - REDIS_HOST=redis
    networks:
      - nextcloud_network

  redis:
    image: redis:alpine
    container_name: redis
    volumes:
      - /docker/nextcloud/redis:/data
    networks:
      - nextcloud_network
    restart: unless-stopped
The docker-compose.yml file above is written in YAML
Please ensure that the values below match in both the ‘db:’ & ‘app:’ parts of the file.:
– MYSQL_PASSWORD=must_match_1
– MYSQL_DATABASE=must_match_2
– MYSQL_USER=must_match_3
Also replace both the ‘/path/to/your/config/folder’ & ‘/path/to/your/storage/data/folder’ with the locations of your config data and your storage data locations.
This docker-compose.yaml file is set to run the Nexcloud service over port 8080, if something is running on this port already, or you encounter an error when launching the service, feel free to change the port to another value. Only change the left-hand value, leaving the right-hand value set to port 80.
Launching the Nextcloud Service
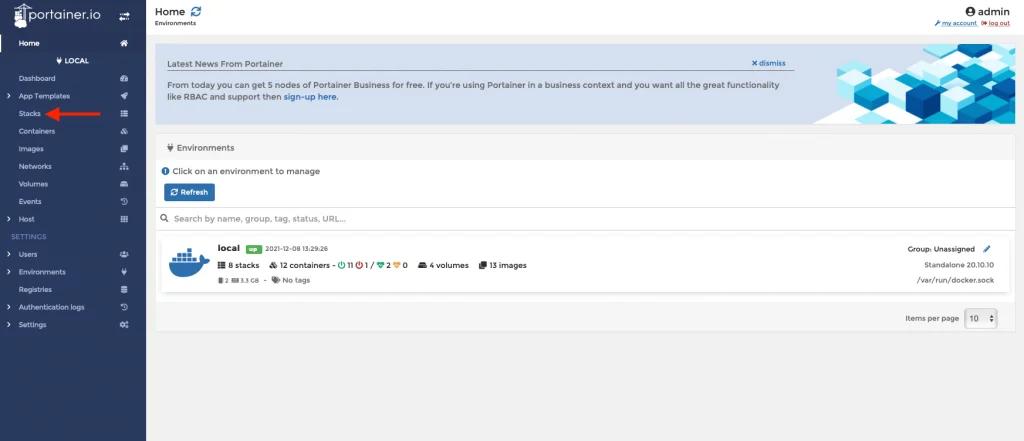
To launch this from within Portainer, (that you can access by navigating to “http://<the server ip>:9000”) we will be using the Stacks feature that is part of Portainer. This is a fantastic feature that allows you to start Docker containers from within Portainer. This eliminates the need to use the command line to create directories and execute docker-compose files through the command line.
To do this, go into the “Stacks” section of Portainer by clicking on it in the left sidebar menu. Then click on “Add Stack”.
You will then be greeted with a blank template we can use to create the Nextcloud service, using the docker-compose.yaml file listed above.
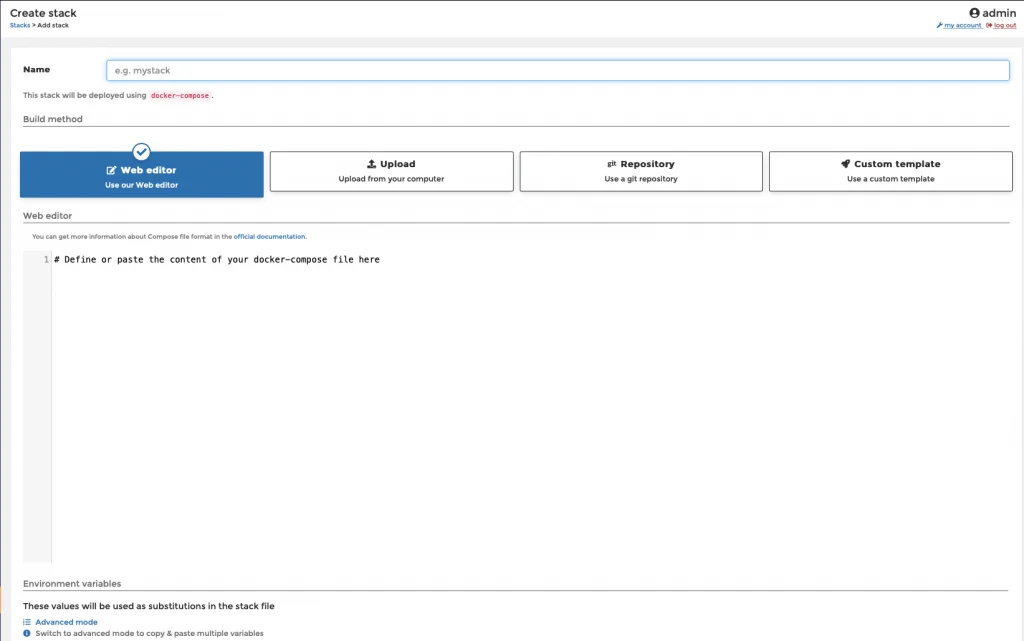
Simply give the service a name, in this case, = “Nextcloud” would be ideal. Then, paste in the file above and make the edits needed to ensure the vales in the ‘db:’ & ‘app:’ parts of the file match and your data values are mapped correctly.
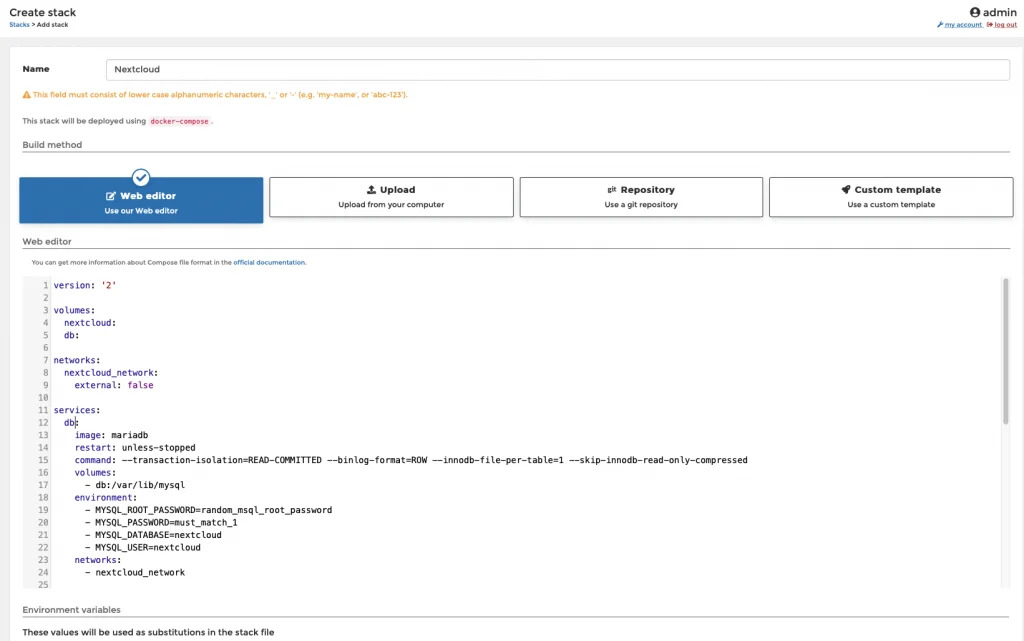
Once this is done, launch the service by clicking the “Deploy The Stack” button towards the lower portions of the page. This will then fetch all the components needed to create the Nextcloud service along with Redis. Depending on your internet connection and the computing power of your machine, this can take a few moments, so please be patent.
How to Access Nextcloud in a Docker Container
In our example, we are using port 8080 to run the Nextcloud service, please bear this in mind if you have made alterations to the value of the port in the docker-compose.yaml file.
You should be able to access the web-gui for Nextcloud by navigating to ‘http://<the server ip>:8080’
Common issues
- If you are using a reverse proxy, you will need to update the config.php file to ensure the domain you are using is added to the ‘trusted_domains’ section of the file.
- Nextcloud is configured to run over http by default, but many people (for understandable reasons) want to use https . Luckily, this is very easy to do by updating the config.php file with ‘overwriteprotocol’ => ‘https’.
How do you edit the config.php file?
The config.php file is located within the ‘/path/to/your/config/folder’ – using SSH or FTP, you can edit this file.
If you wanted to use the Linux command line to edit this file, follow the commands below:
sudo nano /path/to/your/config/folder/Nextcloud/config/config.php*replace ‘/path/to/your/config/folder’ so the path to the file so it is correct.
To set up a file, you need to organize it in the same way as below. There are some fields that you need to pay attention to, including:
- ‘overwriteprotocol’ =>
- ‘overwrite.cli.url’ =>
- ‘trusted_domains’ =>
  'instanceid' => 'redacted',
  'passwordsalt' => 'redacted',
  'secret' => 'redacted',
  'trusted_domains' =>
  array (
    0 => 'your.domain.name.com',
  ),
  'datadirectory' => '/var/www/html/data',
  'dbtype' => 'mysql',
  'version' => '0.0.0.0',
  'overwrite.cli.url' => 'https://your.domain.name.com',
  'overwriteprotocol' => 'https',
  'dbname' => 'must_match_2',
  'dbhost' => 'db',
  'dbport' => '',
  'dbtableprefix' => 'oc_',
  'mysql.utf8mb4' => true,
  'dbuser' => 'must_match_3',
  'dbpassword' => 'must_match_1',
  'installed' => true,
);
Conclusion:
We now have a fast and reliable Nextcloud instance with Redis caching enabled. This setup is scalable, easy to maintain and has the benefit of using containers for deployment. If you would like to learn more about the different projects that can be deployed with Docker, please check out the dedicated Docker section on Apache-IoT.