Home Assistant is without a doubt one of the most popular and rewarding home automation platforms on the market. The platform has been growing exponentially since its inception. There are currently 62,545 active installations (that have opted into the analytic program). This has helped Home Assistant to gain a reputation as a truly open-source platform, one that doesn’t stand on the backs of its users. However, there are still many things that people don’t know about it and how it works.
Home Assistant is open-source automation software for hacking your home. It is created by Paulus Schoutsen and was released in 2013. If you haven’t yet heard of the software, you’re missing out! It is free and open-source software that works with almost any device. It is has been developed by a community that puts privacy first.
Home Assistant makes it easy to connect and control all of your smart devices. It can run on a wide variety of devices including, Raspberry Pi, embedded Linux devices or even as a virtual machine. It comes with multiple built-in integrations for different platforms like Amazon Alexa, Google Assistant, Nest, Phillips Hue and services like IFTTT or MQTT so it’s possible to build a complex system without external software.
How Does Home Assistant Work
Smart devices use a group of languages to talk to each other, whether it’s through Wi-Fi, Z-Wave or Zigbee. This allows these smart appliances to share their data and be controlled easily by other devices. Because all these devices use well-known home automation protocols, Home Assistant can connect to and control these devices. It does this by making use of the platform’s built-in integrations. There are currently 1800+ integrations that are designed to work with Home Assistant and this number grows larger all the time.
Home Assistant can connect with many different smart home devices and can act as a relay. This means that if you are away from home, you can still control things using your smartphone or tablet, you can still set the temperature, turn on devices and control lights with an app on your phone from anywhere in the world.
How Do Automations Work With Home Assistant
Because Home Assistant can communicate with all your devices, it knows what state they are in, if they are off or on, active or dormant. It can use these states and changes to trigger automatons and make other things happen when conditions or triggers are met.
This makes it easy to dim the lights when you start your “movie night” or automagically pause the music when your phone rings. You could have the light turn on as the sun sets, or set the vacuum cleaner to start when everyone has left the house for work.
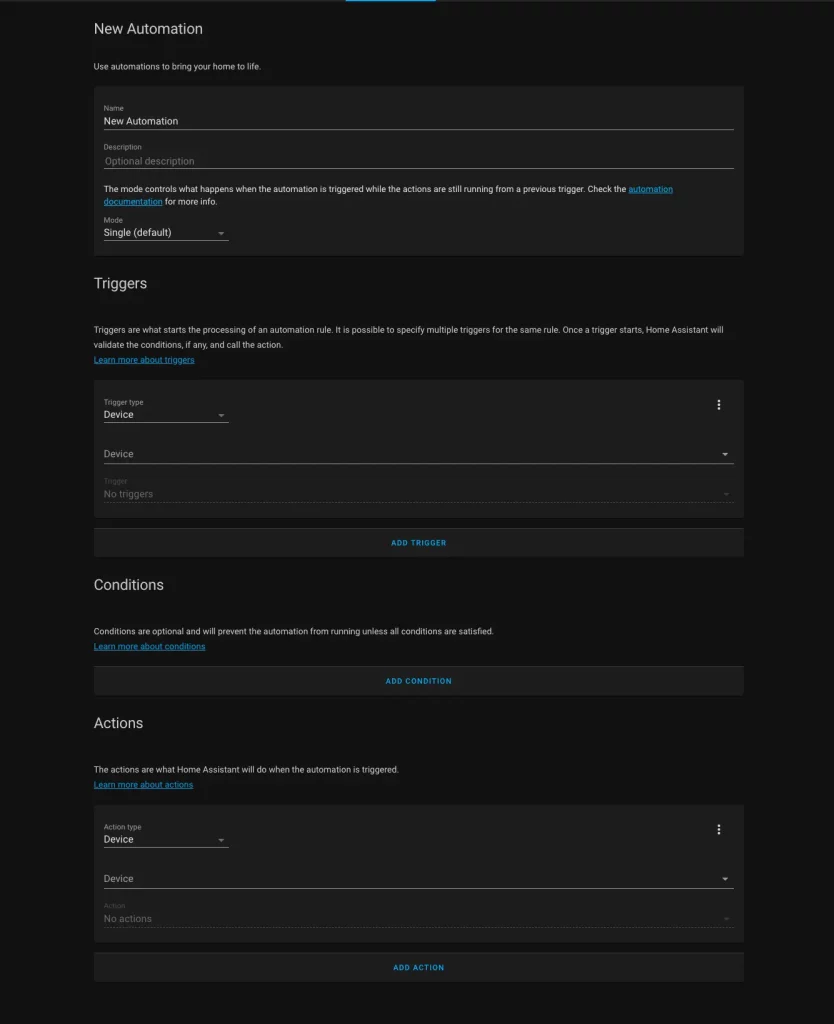
It is now significantly easier to create automations in Home Assistant than it used to be, a few years ago, automations had to be created in a YAML text file. Thankfully, this is no longer the case and automations can now be created in the web-based interface.

If you are just starting out, I would recommend checking out their Automation Blueprints, they are pre-made automations by the community that will help to get you started. They are easy to add and configure, then, once you have found your feet, you can begin experimenting on your own.
How Easy Is It To Get Started
There is no denying that there is a bit of a steep learning curve, but the install methods have gotten easier over time. The level of complexity of your install will vary depending on the device you are going to use to host Home Assistant.
Will you use a dedicated Raspberry Pi, or have it running inside a virtual machine. Will your install be on a Linux distribution, or a Windows machine. Or perhaps even on an Apple Mac. Home Assistant is written in Python3 which is super easy to get up and running on virtually any platform you can think of.
If you have an old laptop or other hardware that you would like to put to good use. We have detailed guides that illustrate how to install Home Assistant in VirtualBox. It’s a great way to repurpose an old computer or laptop that you no longer use.
Home Assistant is now included as a default option in the official Raspberry Pi Installer, which makes getting up and running a real breeze. Now, users of the official Raspberry Pi installer can install Home Assistant quickly and easily.
For an example of a Lovelace Dashboard, simply follow the link. There are plenty of options to choose from and these can be customised in any way you like.
If you wanted to try Home Assistant without having to purchase any additional hardware, there is an interesting GitHub project you could use to get you started. This is not the full version of Home Assistant, but it should be enough for you to test and decide if you like it.


